ShopDreamUp AI ArtDreamUp
Deviation Actions

(For deliprofesor and Hippokrates)
First things first, we'll need to add more variables for the hard drives you want to monitor. There are several ways to do this (and you could get by without doing it at all and just hardcoding the drive letters into the skin) but the most useable way is probably to add them to Settings.txt. I just added two more variables below the one that is already there in Settings.txt. You can name them whatever you want as long as the names are all different.
Now that that's out of the way, we have to add measures for the extra hard drives. In either system skin (eSystem1 or eSystem2), you can pretty much just copy the current [msrDrive] measure for as many hard drives as you need, just change the name of each instance ([msrHardDrive2], [msrHardDrive3], etc.) and change the #drive# variable to the name of the correct variable in Settings.txt. Like so:
(I added "IgnoreRemovable=0" so that the new measures would work with my USB drives. You don't need it if all your drives are internal.)
Lastly, we need to add corresponding meters for each measure that we added. Again, there are lots of ways to do this, I'll just show a few different configurations. First, for "eSystem2.ini" I did this:
You just have to copy the original ([mtrDrive]), but change the name of the meter, the MeasureName, and the variable used in the "Text=" line so that the right meters show the right drives. Using this code in eSystem2.ini makes the skin look like this:

Changing the meters in eSystem1.ini is a little more difficult, only because you have to change all of the X positions manually. The important thing to remember is that the meters are all spaced 150 px apart. So when you add in a meter, to get it's X position just add 150 to the X of the meter before it.
Using the above code, you'll also need to change the X value in [mtrNet] to 750 so that things don't overlap. The finished product looks like this:

If you want to use up less horizontal space, you can combine the two different layouts, putting everything horizontally like in eSystem1 but stacking the HD meters like in eSystem2:
That should look something like this:

And that's that. You can theoretically add in as many or as few drives as you want, just make sure that:
- the variable names for the drives are all different
- The Measure and Meter names are all different
- The right Variables are used in the right Measure which are used in the right Meters.
(That's why numbering them is so convenient, it helps make sure everything matches.)
Hopefully this will help both of you out; let me know if you have questions or problems.
First things first, we'll need to add more variables for the hard drives you want to monitor. There are several ways to do this (and you could get by without doing it at all and just hardcoding the drive letters into the skin) but the most useable way is probably to add them to Settings.txt. I just added two more variables below the one that is already there in Settings.txt. You can name them whatever you want as long as the names are all different.
drive=C
drive2=H
drive3=D
Now that that's out of the way, we have to add measures for the extra hard drives. In either system skin (eSystem1 or eSystem2), you can pretty much just copy the current [msrDrive] measure for as many hard drives as you need, just change the name of each instance ([msrHardDrive2], [msrHardDrive3], etc.) and change the #drive# variable to the name of the correct variable in Settings.txt. Like so:
[msrDrive]
Measure=FreeDiskSpace
Drive=#drive#:
InvertMeasure=1
UpdateDivider=10

[msrDrive2]
Measure=FreeDiskSpace
Drive=#drive2#:
InvertMeasure=1
UpdateDivider=10
IgnoreRemovable=0

[msrDrive3]
Measure=FreeDiskSpace
Drive=#drive3#:
InvertMeasure=1
UpdateDivider=10
IgnoreRemovable=0
(I added "IgnoreRemovable=0" so that the new measures would work with my USB drives. You don't need it if all your drives are internal.)
Lastly, we need to add corresponding meters for each measure that we added. Again, there are lots of ways to do this, I'll just show a few different configurations. First, for "eSystem2.ini" I did this:
[mtrDrive]
Meter=STRING
MeasureName=msrDrive
MeterStyle=sText3
X=0
Y=5R
Percentual=1
Text="HD#drive# %1%"

[mtrDrive2]
Meter=STRING
MeasureName=msrDrive2
MeterStyle=sText3
X=0
Y=5R
Percentual=1
Text="HD#drive2# %1%"

[mtrDrive3]
Meter=STRING
MeasureName=msrDrive3
MeterStyle=sText3
X=0
Y=5R
Percentual=1
Text="HD#drive3# %1%"
You just have to copy the original ([mtrDrive]), but change the name of the meter, the MeasureName, and the variable used in the "Text=" line so that the right meters show the right drives. Using this code in eSystem2.ini makes the skin look like this:
Changing the meters in eSystem1.ini is a little more difficult, only because you have to change all of the X positions manually. The important thing to remember is that the meters are all spaced 150 px apart. So when you add in a meter, to get it's X position just add 150 to the X of the meter before it.
[mtrDrive]
Meter=STRING
MeasureName=msrDrive
MeterStyle=sText3
X=300
Y=0
Percentual=1
Text="HD#drive# %1%"

[mtrDrive2]
Meter=STRING
MeasureName=msrDrive2
MeterStyle=sText3
X=450
Y=0
Percentual=1
Text="HD#drive2# %1%"

[mtrDrive3]
Meter=STRING
MeasureName=msrDrive3
MeterStyle=sText3
X=600
Y=0
Percentual=1
Text="HD#drive3# %1%"
Using the above code, you'll also need to change the X value in [mtrNet] to 750 so that things don't overlap. The finished product looks like this:
If you want to use up less horizontal space, you can combine the two different layouts, putting everything horizontally like in eSystem1 but stacking the HD meters like in eSystem2:
[mtrDrive]
Meter=STRING
MeasureName=msrDrive
MeterStyle=sText3
X=300
Y=0
Percentual=1
Text="HD#drive# %1%"

[mtrDrive2]
Meter=STRING
MeasureName=msrDrive2
MeterStyle=sText3
X=300
Y=5R
Percentual=1
Text="HD#drive2# %1%"

[mtrDrive3]
Meter=STRING
MeasureName=msrDrive3
MeterStyle=sText3
X=300
Y=5R
Percentual=1
Text="HD#drive3# %1%"

[mtrNet]
Meter=STRING
MeasureName=msrNetUp
MeasureName2=msrNetDown
MeterStyle=sText3
X=450
Y=0
W=200
H=15
AutoScale=1
NumOfDecimals=0
Text="NET %1/%2"
That should look something like this:
And that's that. You can theoretically add in as many or as few drives as you want, just make sure that:
- the variable names for the drives are all different
- The Measure and Meter names are all different
- The right Variables are used in the right Measure which are used in the right Meters.
(That's why numbering them is so convenient, it helps make sure everything matches.)
Hopefully this will help both of you out; let me know if you have questions or problems.
CircuitousTwo FAQ
Welcome to the CircuitousTwo Frequently Asked Questions guide. I will use this journal to post answers to questions about the skins that I either get a lot, or that are too long and complicated to put in a mere comment.
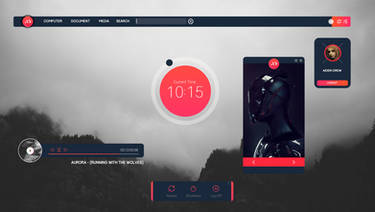
:thumb376652231:
Does the media player skin work with Spotify?Short answer - not really.
The NowPlaying plugin used in the media player skin only has partial support for Spotify. As far as I can tell, this is mostly just because Spotify only shows limited information in the first place. From the manual, here is what NowPlaying can do with Spotify:
Partially supported. Only the types Artist, Track and the bangs Play, Pla
Rainmeter Code Walkthrough #2 - Binary Clock
If you are unfamiliar with the binary (base 2) numeral system, you may want to do some reading here before going through the rest of this post.
The aim of this skin is to create a binary-coded decimal clock in Rainmeter. To keep this short, we'll just do the hours and minutes (especially since the code for seconds is virtually identical to the minutes anyway).
Download Full Skin Here
(package includes several variants - we'll be going through "Decimal_HM.ini")
The Groundwork
To begin, we'll need [Rainmeter], [Metadata], and [Variables] sections. Once again, we'll use include (https://www.deviantart.com/include) to put the variables in an external file (called Appearance.
DINAJ code for ~legionfalls
This should make the skin only appear when you need a jacket, and be invisible otherwise. (Note that I haven't tested this personally, so let me know.)
All the measures before [mCalcYN] can stay the same. However, [mCalcYN] itself needs to be changed like this:
[mCalcYN]
Measure=CALC
Formula=(1 < mCalcTemp) || (0 < mCalcWind) ? 0 : 1
Then we're going to make some change to the meters. First we're going to add a blank transparent image meter, and move the MouseActions out of the [Rainmeter] section and into this meter - that way you can get the buttons to show even if the strings are hidden, and there will always be a placeholder. Pre
Rainmeter Code Walkthrough #1 - Do I Need a Jacket
This is a code walkthrough of my "Do I Need a Jacket?" Rainmeter weather skin. The goal of the skin is to replicate doineedajacket.com in a Rainmeter weather skin, including the ability of the end user to set their own temperature thresholds. Here's a screenshot of what this skin looks like:
Download Here
The GroundworkFirst, lets get the basics out of the way. We of course need [Rainmeter], [Metadata], and [Variables] sections.
[Rainmeter]
Update=1000
Author=Flying Hyrax | flyinghyrax.deviantart.com
DynamicWindowSize=1
MouseOverAction=!Execute [!ShowMeterGroup buttons][!Redraw]
MouseLeaveAction=!Execute [!HideMeterGroup buttons][!
© 2011 - 2024 FlyingHyrax
Comments1
Join the community to add your comment. Already a deviant? Log In
Thank you for this quick and detailed answer  (Smile)") I added your codes and looking great now! [link]
I added your codes and looking great now! [link]